|
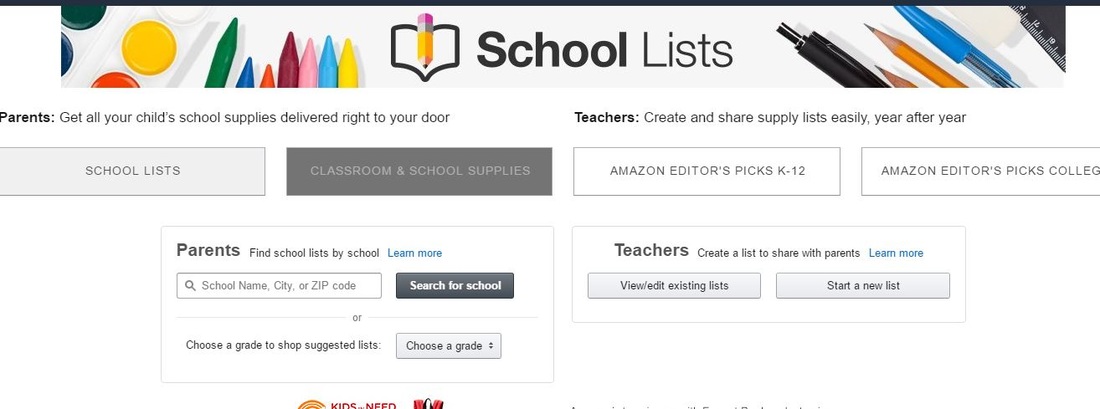
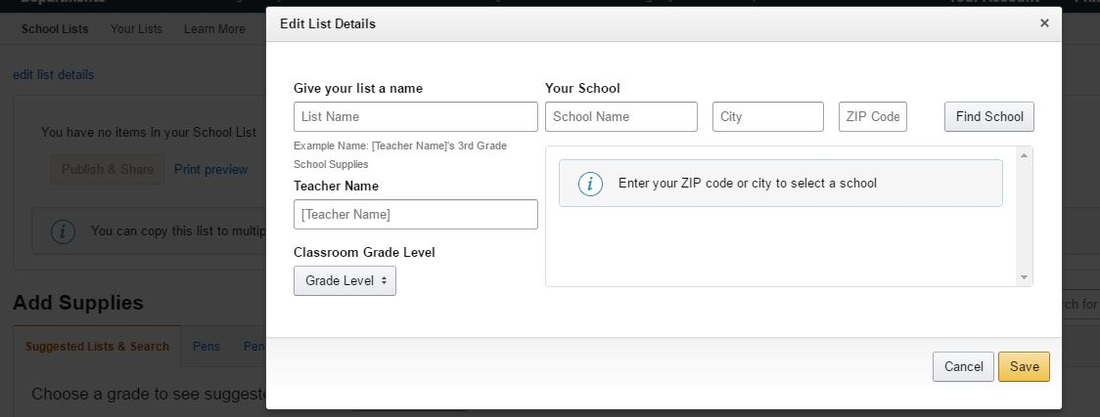
Teachers can create school supply lists for students and parents on Amazon.com. The obvious advantage is that parents could order supplies directly from Amazon, but the lists can also be printed and taken to the store during back to school shopping. The site has two sides: the parent list to search for school supply lists, and the the teacher side to create lists. Start by choosing "Start a new list" on the Teacher side. Amazon will prompt you to sign in, and then you can create a book list or school supply list for your classes. You can also copy the list and edit your choices, so I can make a list for my Comp 1 class and use the same list for Comp 2, only changing the textbook. Choose "editlist" on the far left, and then fill in the details. If you teach college or are using the lists for a workshop, homeschool group, camp, or professional development, you can choose "other". The only difference will be that your list will not be found through the parents' side of the search list, and you will need to give out the URL. Fill in your details, and press save. Amazon will walk you through the steps of editing your list, adding items, and editing those items so that students know if they are optional and if other verisons are acceptable. On the last screen, you will have the choice to print off a list or give students and parents a URL. I put all of my steps in a collection below, and you can see the my test collection of an Amazon school supply list here. Remember, if you are a camp, college, or homeschool, choose "My school is not listed" so that you can add it in. If you are in a k-12 school, you should be able to find your school on the drop-down list and add your list to that school, so it will be found when parents look it up on Amazon.
0 Comments
Using computers to communicate means more than student email or instant messenger. Teachers can expect their students to work together in a meaningful way with some free tools available online. The mindset of computer usage is toward and understanding of Cloud Computing- working, sharing, and collaborating. Schools can reflect this mindset by incorporating collaboration in the computer lab and beyond. Understanding Forum Options Forums, also called message boards or bulletin boards, are built on group communication and collaboration. Generally, one person posts a topic, and other people build on it by offering comments and information that can be read by the whole group. Sites offer different levels of access, and the teacher would want to be the exclusive moderator, to maintain control over topic creation and comments. If a teacher simply wants students to be able to communicate and discuss in an online forum, a simple message board will be sufficient. If a teacher wants students to share files or work on a topic and add information collaboratively, online web applications, such as wikis, might be more useful. Creating a Class Message Board Many teachers and students already use Nicenet, a free, simple forum that does not have advertising. The site is reliable and powerful, and offers a secure forum for group conferencing, personal messaging (which teachers may want to disallow), and document sharing. How to Create a Nicenet Forum for a ClassSetting up a Nicenet forum with topics will take a minimum of 20 minutes, so teachers need to have a block of uninterrupted time available.
Nicenet will give each class a "Class Key" which is needed to join classes. This tool makes Nicenet secure and private. If the teacher wants to create additional forums, he simply click on "create a class", but it is important to continue using the established user name. How Students Join and Use a Nicenet Forum
Teachers need to take students on a tour of Nicenet, showing them how to post messages in the conference area and post documents on the document section. Explain the teacher's policy on messaging (some teachers do not allow it; personal private messages are counter-intuitive to group collaboration). HTML is available on Nicenet, but tends to slow down the site. How to Create a Class Wiki A wiki supports the curriculum by giving students shared online workspace. There are multiple sites available for class collaboration, such as class-wiki.intodit.com, PBwiki (which offers password protection) and the extremely powerful Google Apps (which may be too powerful for simple class communication purposes). One excellent wiki site for teachers is Wikispaces, which has a special section for educators. Once a teacher has selected a wiki or other collaborative-writing and working application, the steps to creating an online workspace for students is similar other forum set up procedures. Again, teachers will:
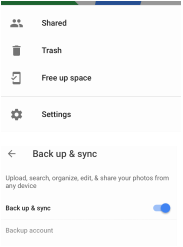
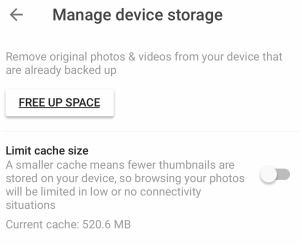
Once students are working as a group, new opportunities and challenges will present themselves. Students will be able to create online projects, but some may be frustrated by the lack of fanciness that a hands-on project can offer in the classroom, with glitter, markers, and colored paper. Although new leaders will emerge in a technology-based project, the same headaches that come with any group work will appear in collaboration, although the beauty of message boards and wikis is that the teacher can truly determine "who said what" first. The end results are impressive, do not use up classroom supplies or space, and can be shared with parents from home. Other classes can see work examples, and students in other classes can build on each other's work. The positives of working in collaboration online far outweigh the negatives. Although some school districts are exceedingly restrictive in approved internet sites, there are some sites that have established their safety and reliability, and they are popular with teachers and students. Originally posted on Suite101 on November 29th, 2008  I use iCloud to back up my iPhone, including my photos and videos, but I have also starting using Google Photos. I used Picasa when it was active, so I have some Google Photos already, and I used to have an Android (RIP, my HTC) so I have a lot of Google Photos from those days. After installing the Google Photos app, I went into settings (the three lines on the top left) and choose Back up & sync. I made sure my photos were set to auto-backup at the free storage quality. Google started saving my photos, and whenever I check it, I see a nice collection of my recent photos and screenshots. I don't know how the photos will print, but I back up my photos at full-size to my computer and this Google Photos option is free. We all know that free is good. There is a setting called "Free Up Space", which will remove photos that have been backed up. I plan to use this when I am low on phone storage, which happens frequently. I am leaving the "Limit cache size" option off, because I like seeing the little thumbnails, but for someone who had a lot of photo storage space issues, limiting the cache might be a good options. |
AuthorAlly Sharp is a teacher, writer and editor, and technology trainer. Archives
December 2016
Categories
All
|


 RSS Feed