|
As I am updating my MacBook, I needed to connect to the internet. After several failed attempts, I decided to make my Windows 10 computer the wi-fi hotpot.
To do this,: Search for Settings in the "Ask me anything" searchbox. Open the Network & Internet Tab Go to Mobile Hotspot Choose "Share" and follow the steps to see your network name and password. It worked great!
0 Comments
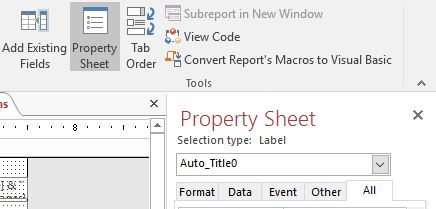
There is a way to add in RGB and HSL color codes for Access to make your forms and reports match your website's color scheme.
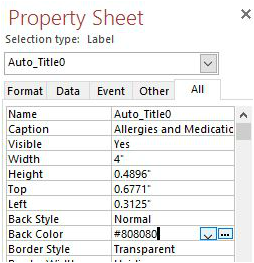 When you select the object where you want to have your color, find that line on the property sheet. If you know your color code, you can write it in. Otherwise, move your mouse over the color area (in this screenshot is it labeled "Back Color"), you will see a dropdown arrow and an ellipse (...) box. Choose the ... to get more options. A familiar color selection box will pop up, but we are not done yet. 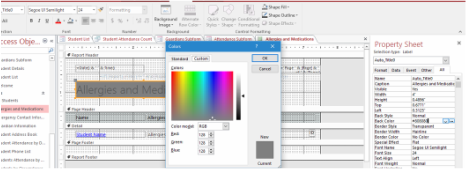 The color box will default to "Standard", so left-click on "Custom". The color box will default to "Standard", so left-click on "Custom". Choose "More Colors" down at the bottom of the Color Picking box. When you are there, you will see another box. Choose the Custom Tab, as shown to the right. You will then be able to enter the RGB or HSL colors. If you want to match Pantone colors, you need to convert them. On the Pantone color site, you can find your color and Pantone will give you the color values for RGB, HEX/HTML, and CMYK. These instructions were written with Access 2016, but they apply to Access 2010 and 2014, as well. There are two tools I like to use when reading in the Safari web browser on my iPad, especially if there are a lot of ads on a page. This is good information for personal use and for teachers to share with students in the classroom. When there are four lines on the top left corner of your browser, clicking those moves the screen into a reading-friendly view. 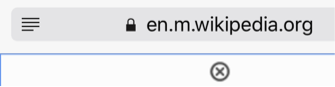 By clicking on those lines, you launch the Reading View, and the four lines turn black. 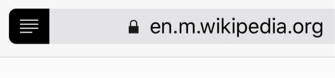 Additionally, there is an aA in the corner, indicating readers can change the fonts and font size. 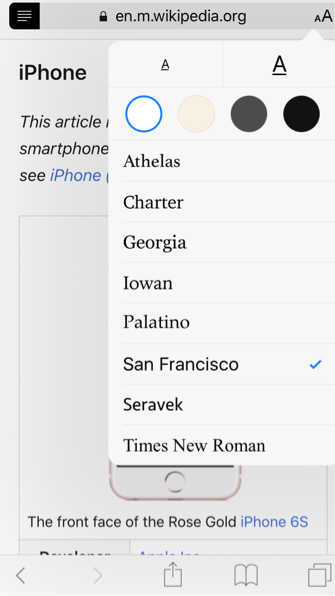 Images that are included in the article remain, but ads and formatting that can seem cluttered on a small screen disappear. In the following examples, notice how the Wikipedia notice disappears, and how the screen color and font size and type is adjusted. 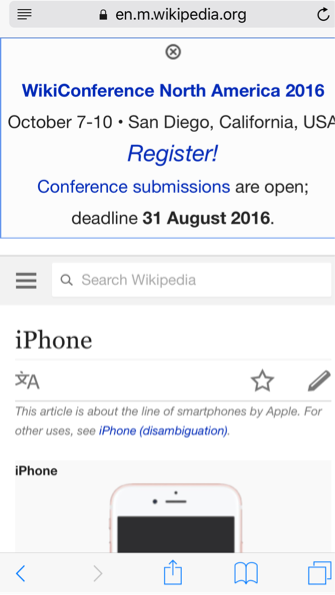 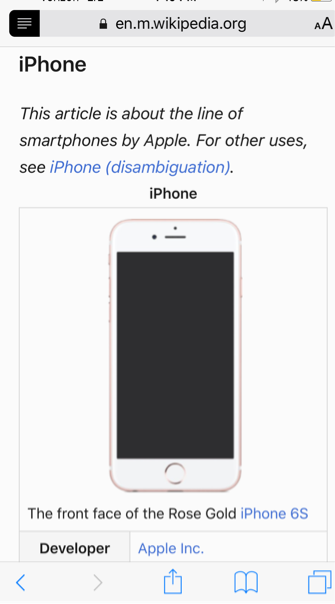 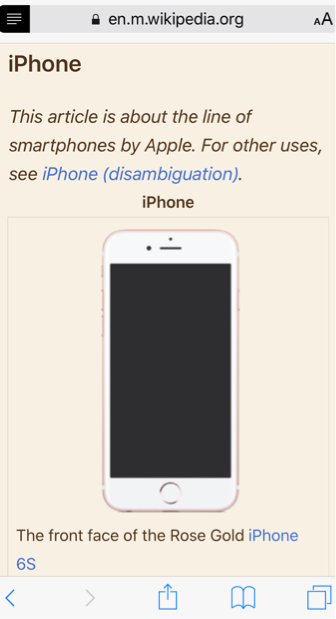 Easier reading is just a few clicks away!
Recently I was teaching a Microsoft Publisher 2013 class, and we talked about adding and editing images. The tricky thing about working with pictures in Publisher is that even though you can insert images with a transparent background, you can't remove the background yourself. To do this, head over to Microsoft Word. Use the same techniques to insert an image that you use in Publisher: 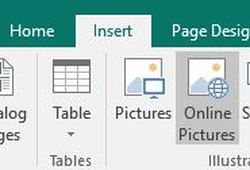 Microsoft Publisher 2016 Microsoft Publisher 2016 After you click on the Insert tab, choose either Pictures or Online Pictures to add your picture into your publication (Publisher) or document (Word). Once you have inserted your image, watch for the contextual toolbar to appear that allows you to edit your pictures. 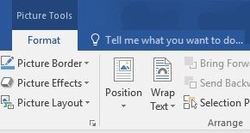 Microsoft Word 2016 Microsoft Word 2016 The contextual toolbar will say Pictures Tools above the Format tab. When you click on that new toolbar, you will have a lot of additional tools to edit, adjust, and polish your pictures. We want to look on the far left side of the screen in the Adjust toolbox where we can remove the background. 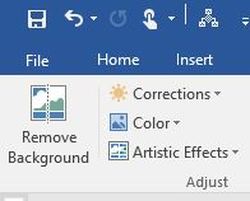 Microsoft Word 2016 Microsoft Word 2016 When you click on Remove Background, you will notice part of your picture turns violet. This is the section of your image that will be erased. If you do not want that part included, or if you want to include other areas, use the "Mark Areas to Keep" and "Mark Areas to Remove" tools to adjust the purple shading. When you are done, press Keep Changes. If it did not turn out the way you expected, remember that CRTL + Z will undo your changes and you can start again. Also, you may need to do some clean-up through cropping or in Microsoft Paint. 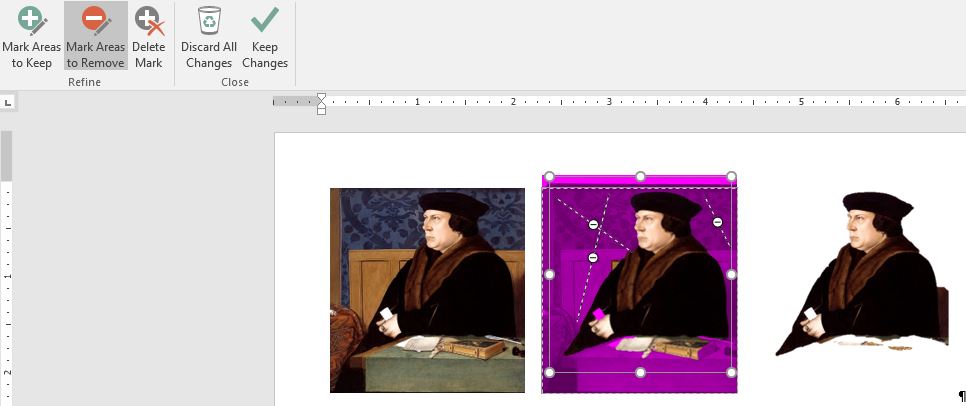 Once you are done with the background removal, right click and choose copy, then paste the image into your publication in Publisher.
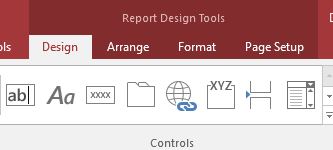
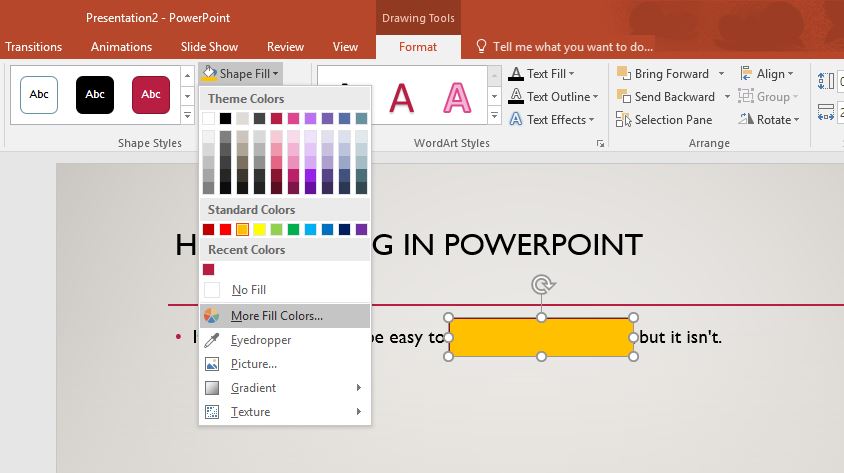
You can copy and paste between Microsoft Office products, so making changes in Word and pasting them into Publisher is a good solution to removing the background until Microsoft adds this features into a future version of the software. It seems like it would be easy to highlight in PowerPoint, but it isn't. There isn't the standard highlighter tool that is in Microsoft Word. 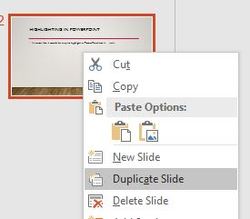 Duplicating slides in PowerPoint 2016 Duplicating slides in PowerPoint 2016 The easiest way to do this is: 1. Create your slide. 2. Copy the PowerPoint slide by right-clicking on the navigation pane and choosing "duplicate".) The new, copied slide will immediately appear under the slide you just right-clicked. 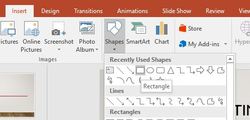 Insert a rectangle in PowerPoint 2016 Insert a rectangle in PowerPoint 2016 3. Go to the Insert table and choose shapes. When you press the dropdown menu, you will see the rectangle shape. You are going to draw this over the words you want to highlight in the duplicated slide. After you draw the rectangle over the word, the contextual toolbar for drawing will appear. We will use this to make the highlighting translucent.
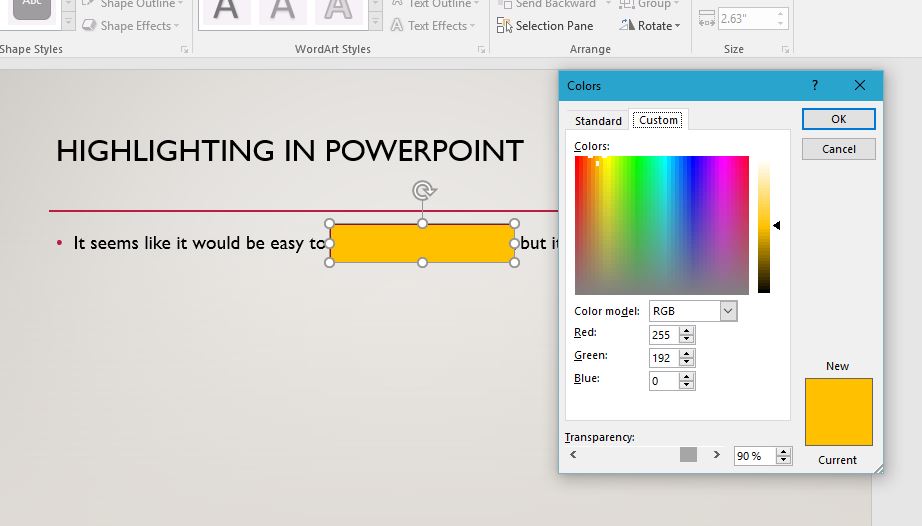
4. In the Drawing Tools contextual toolbar, choose Shape Fill and pick the color for your highlighting. At first it will cover the word, but don't worry. We will change that in a moment. 5. Choose More Fill Colors. At the bottom of the Colors dialogue box, there is a slider to choose the Transparency option to 60% (or type in the box). This may need to be adjusted depending on your screen and how dark your classroom is; 90% is the lightest I think people can see. You won't see the changes until you press OK. 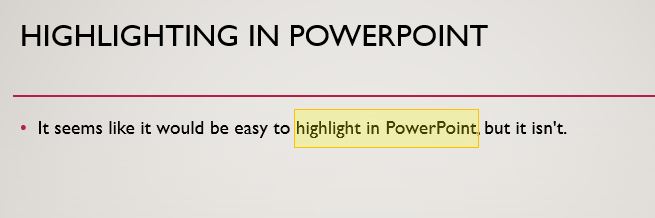 The transparent shading creates the look of highlighting in PowerPoint. Once you left-click on OK, you will see the word highlighted on your screen, and when you move from the previous slide to the highlighted slide, it will have the effect of "highlighting" on the screen.
|
AuthorAlly Sharp is a teacher, writer and editor, and technology trainer. Archives
December 2016
Categories
All
|
 RSS Feed